Tuesday, January 7, 2014

How to Make Chevron Letters

One of the most fun experiences of my life was not finding out what we were having with our second baby.  I was so convinced we were having a boy that we painted the baby room a gorgeous gray-blue.  We thought that in the off chance we had a girl, we could just "girl it up" with some pink.

Well, a baby girl and six months later, we finally got around to adding some splashes of pink to Ellie's blue room!


My sister spotted these pretty chevron letters on Pinterest and sent me the pin.  I knew the minute I saw it that I had to make one for my sweet girl!  Plus, it was super cheap to make.  Always a plus in this house.

Materials:
Wood Letter (I used a 40% off coupon at Hobby Lobby- ran me about $2)
Paint
Ruler
Pencil
 Painter's Tape (I actually ran out and had to use masking tape)
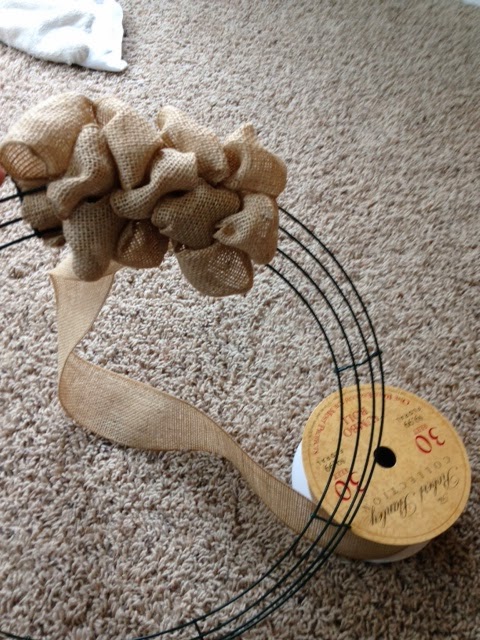
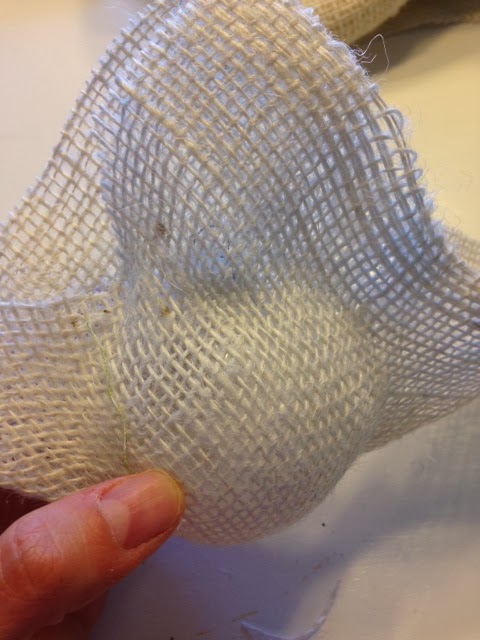
Burlap if you'd like to add a rosette
Ribbon or Twine if you want to hang it up

1.  The first thing you need to do is paint your letter the base coat.  Paint it the lighter color (in my case it was vintage white).  Let it dry.

2.  Draw a very faint line down the middle both horizontally and vertically of your letter.  Next draw lines to the right and left of the vertical line (measure them to make sure they're equal).  Do the same for above and below your horizontal line, but add 3-4 lines.  The goal is to make small rectangles.


2.  Next, using a ruler you need to draw lines moving from the top left of each rectangle to the bottom right, then from the bottom left to the top right.  The key is to draw as light as you possibly can so it easily erases!  You could even try just taping it without drawing the lines.  I needed to visually see it before I taped it which is why I drew them.  Also, I realized afterward that it's easiest to draw the diagonal lines on the complete rectangles first.  Then do the ones that aren't a full rectangle.  You can base the lines off the complete ones.  (Hope that makes sense!)


3.  The next part is the most tedious.  You need to tape the lines so your lines aren't all wavy and uneven when you go to paint them.  Then you can paint away!  Don't go overboard with the paint, though, or it could bleed underneath the tape.


4.  Slowly remove the tape once your paint has dried.  Add a rosette if you'd like!  I hot-glued twine to the back so I could easily hang the letter up on Ellie's wall.  I also roughed up the edges just a little bit with sandpaper.


This could easily be my favorite Pinterest project so far.  I LOVE how it turned out, it only cost a few bucks, and it was done in no time at all.  Plus, Ellie's room is finally looking a little more feminine!

Saturday, January 4, 2014

A Serious One

I knew something was wrong.  The ultrasound technician and her trainee had been scanning my abdomen for over twenty minutes, not saying a word to us.  They would mutter things here and there, but not so we could hear.  When the technician finally set the device down, she let out a soft sigh.  "We cannot detect a heartbeat," she said gently.  First blow.  "And not only that, but there are two babies."  Second blow.

I could not even control the sound that came out of my mouth.  I remember feeling Todd's hand gripping my shoulder and then, as if it is physically possible, feeling my heart break in two.  I had never known such loss, such pain before.  I wept openly.  We both did.

You see, we had already had a healthy pregnancy and birth: a beautiful baby boy named Cole.  We planned that pregnancy, and planned this one.  We wanted our children to be a little over two years apart.  Everything was going smoothly, just as we hoped.  I had absolutely no signs of a miscarriage.  (I would learn later that that is called a "missed miscarriage".)  Just an hour before the ultrasound tech delivered the devastating news, Todd and I were laughing and smiling, joyfully anticipating seeing our precious baby on that monitor.  I could have never predicted how my life would turn upside down so quickly.

The months to follow were painful.  I blamed myself.  I questioned God and His plan for my life.  Bitterness and sorrow swelled in my heart.  I have to admit, I was pretty self-centered during this time.

We decided to try for another baby in June of 2012.  This time I was on guard.  I was only around six weeks pregnant when I experienced my second miscarriage.  While I was devastated to lose another baby, I was more angry than anything.  Why was this happening to us?  Were we to have only one child?

I remember receiving a call from one of my closest friends a month or so later.  I knew the second her name popped up on my phone that she was pregnant.  (To my friend: thank you for having the courage to call me.  I know how hard it must have been.)  While I was genuinely happy for my sweet friend to be pregnant with her second baby, my heart filled with anguish.  After we hung up, I set the phone down and once again, wept.

I called my sister, Lindsey, after I regained my composure.  I hope you have someone who can speak truth to you like my sister can to me.  We talked for a long time, mostly about perspective.  I was so caught up in my plan and my time frame that I could not step back and see life through an eternal perspective.  After all, our lives are but a breath in the scheme of eternity.  Looking back, that conversation with my sister was one of the most significant turning points of my healing process.

While this chapter in my life does have a happy ending (our precious baby girl, Ellie Quinn, born this past July),  I know many people cannot say the same.  My hope is that this last thought will bring you some comfort, even if it's just a little bit...

It was about a year after our first miscarriage.  Todd and I were reflecting on "that day" when he brought up how the ultrasound technicians cried with us.  They cried with us!  I had no idea.  Somehow I missed how these women, who had never met us before, were so deeply moved that they cried with us.  And there is no doubt in my mind that our Heavenly Father, who knows us and loves us more deeply than we could possibly fathom, cries with us, too.  We are not alone in those dark hours.  He feels our pain, our sorrow, our hurt, and He weeps with us not only because He can sympathize with us, but because He loves us.

We are not promised an easy life.  In fact, it is inevitable that we will all experience heartache if we haven't already.  Thankfully we have a God who "heals the brokenhearted and binds up their wounds" (Psalm 147:3).

Thursday, December 5, 2013

New Toothpaste

There are many benefits to working from home.  Among those include not having to set an alarm, staying in your pajamas all morning (or afternoon...), getting outside when the weather is warm, and perhaps best of all, cuddling with your kiddos any time you want.  Of course, there are some downsides, too.  It can be incredibly difficult to balance getting your work done and and making sure your kids are staying out of trouble.  I experienced one of those moments this morning.

As I sipped on my morning coffee and checked my email, my three-year-old, Cole, was happily playing upstairs.  I could hear him in the bathroom, which I assumed meant he was filling up his squirt gun to spray into the bathtub (a favorite pastime of his).  A few minutes later he came bounding downstairs with the most precious, excited smile on his face.  "I brushed my teeth all by myself!" he exclaimed.  I beamed with pride, gave him a high-five and said, "Way to go, bud!  I'm so proud of you!"  I really was, too.  Cole smiled and added, "And I used a NEW toothpaste!"  Hmm... new toothpaste?  We didn't have "new" toothpaste in his bathroom.  He darted back upstairs to grab this so-called new toothpaste to show me.

A minute later he came back into my office, toothbrush, cup, and, lo and behold, his "new" toothpaste in hand.  What was it?  Neosporin!

I promptly called my sister, because, being that she is older and wiser, she would know what to do.  "Well, have you called Poison Control?" she asked calmly.  No, no I had not.  She assured me that he was probably fine, but texted me their number to call them anyway.  After I got Cole to rinse out his mouth (which, of course, he passionately resisted), I gave them a call.  The lady at Poison Control was incredibly sweet and once again, I was assured he would be fine.  In fact, an hour or so later she called back just to check in on him!

Needless to say, the lesson for this mom has been learned.  If I want to keep my job, I cannot watch my kids every second of the day, but I can make sure the Neosporin isn't within reach of little hands (the top shelf of the medicine cabinet is apparently not enough!).  I also have the Poison Control number programmed into my phone now.  It's 1-800-222-1222.  Add it to your phone if you haven't already.  You never know when you'll need to give them a call!

Sunday, December 1, 2013

Christmas Joy Sign


I made this sign a few years ago-- it's ridiculously easy and cheap!  I bought three frames from the Dollar Store, some scrapbook paper, and a little bit of red felt.  To make the lettering look neat, print out the font you like and pin it along the letters to the fabric.  Cut out the letters by following the printout and then glue the letters to the scrapbook paper.  I ended up gluing the frames together, too (I think I used wood glue).  It's a seriously cute craft on a seriously small budget (it definitely cost me less than $5)!

I love the word "joy".  It's such a little word but it has so much meaning and depth.  I hate to be cliche and quote the Dictionary.com definition, but it's too good not to.  It says, "the emotion of great delight or happiness caused by something exceptionally good or satisfying."

What's funny about that definition is that the world of consumerism is constantly trying to live up to it, especially during the Christmas season.  They want you to believe that their product will bring you joy, that whatever they're trying to sell you will completely satisfy you.  Well, to put it bluntly, it won't.  Could you imagine if products did indeed satisfy us?  Think about it, if we actually received true joy from these products, we would have stopped buying new products long ago.  In fact, our society as we know it would cease to exist.  We'd all be home joyfully using the very first product we ever received with no intent (or need) in finding a new one to satisfy us.

Does that make sense at all?  This might be one of those times where it's completely logical in my head but not so much on the screen.

Anyway, I hope this Christmas season you're able to experience true joy, the kind that is deeply good, satisfying and lasting; the kind that doesn't come in the form of a box, but rather that of a baby born in a manger.

Joy to the world, the Lord has come-- let earth receive her King!


Sunday, November 17, 2013

DIY Burlap & Twine Ornaments

I know we haven't even had Thanksgiving yet, but once it comes we only have 3 1/2 weeks to jam our crafting, cookie-making and decorating in before Christmas arrives (I guess shopping, too, but that's my least favorite thing to do during the holiday season).  In my book, that's simply not enough time to do all that I have planned so I decided to start a little bit early this year.  Don't judge.

It's no secret that I love everything about burlap.  You can probably tell since this is the second craft I've posted on here and both have to do with burlap.  I wonder if in 20 years I'll ask myself why I used so much of it-- God willing, we'll find out!

So, I wanted to try out my own version of a burlap ornament and here is what I came up with:


What do you think?  I wish my "joy" lettering was a little smaller, but other than that I'm pretty happy with how these turned out.

If you're interested in making some yourself, here's what you need:

*Light (natural) burlap
*Clear ornaments (I used glass)
*Mod Podge 
*Twine
*Hot glue
*Sponge paint brush
*Ribbon
*Scissors
*Bells (if desired)


1.  Place your ornament on the burlap, folding it over the ornament so the triangle peaks above the top by a few inches.  Use this rough estimate to cut the burlap into a square.


2.  Coat the ornament with Mod Podge using the sponge paint brush.  You can be generous.  Moving quickly, wrap the ornament with the burlap so it peaks at the top and the sides of the ornament.  Continually smooth the burlap, pinching it tight to the two parts where the burlap comes together.


4.  Add more Mod Podge if the burlap is not sticking to the ornament.  It can take a few minutes of smoothing and pressing to get it pinched neatly together, but be careful not to leave your fingers in one spot too long (your sticky fingers could pull up the burlap).  Once it has dried, cut off the excess burlap.  It should look like this:


5.  Next you can add a design or word using hot glue and twine.  Using thin lines of glue, add the twine to the burlap.  If you're creating letters, map it out beforehand (see below).


6.  To finish, hot glue the twine as you wrap it around the top. 


7.  Tie your ribbon to the top.  To add a pop of color to each ornament, I used a red ribbon and some red bells.


What I love about this is that the possibilities are endless.  You can do letters, swirlies, stripes, etc.  You can even swap out the twine for some other kind of material.  I also considered covering a red or silver ornament with burlap.  Could look cool, right?

Well, happy Christmas crafting, all!

Sunday, November 10, 2013

The "Like" Button

No one likes my husband.

Just kidding.  Of course they do.  What I mean is, no one "likes" my husband's Facebook statuses, videos or pictures.  No one shares his Tweets, "hearts" his pictures on Instagram or comments about his blog.  Not because they're not funny or cute or interesting, but because he doesn't post any.  (Actually, he doesn't have Instagram or a blog, but you get my point.)

Perhaps you didn't have Facebook when it was first introduced in 2004, but believe it or not, it didn't have the "Like" button available at the time.  In fact, it wasn't even introduced until 2010.  Isn't that weird?  That was just a little less than four years ago!  But now, oh man, the "Like" button is everywhere.  We couldn't imagine our lives without it.


Don't get me wrong, I LIKE the "Like" button (get it?).  I enjoy letting a friend know that I found his or her post cute/hilarious/entertaining.  I also appreciate it when others do the same for me.  However, I also hate it.  It's a dangerous game.  Unless you're the most secure person in the world, a "Like" can play with your mind if you let it.

Let me elaborate.  Let's say you update your Facebook profile picture and it receives 23 likes.  Hooray!  Twenty-three people enjoyed your new picture enough to click a button for it.  But wait, Sally just updated her profile picture and within two minutes it has 384 likes.  What in the world?  Isn't your picture just as cute as Sally's?  Why did she receive so many more likes than you did?

See what I mean? 

If we're not careful, we can put our self-worth in the "Likes" of a virtual world (even if it's just momentary).  Isn't that just silly?  Most of us are guilty of it, though.  (If not then I might find myself in a super awkward and vulnerable position as I'm admitting that I am.)  If you let it, the "Like" button can discourage you, cause you to compare yourself to others, and perhaps even worst of all, it can make you prideful.

I'm not requesting the "Like" button be removed from existence.  I'm not suggesting we stop posting, sharing, or even liking.  All I'm saying is that we need to check ourselves every once in a while.  Are we basing our worth on the "Likes" of others?  If so, we're walking on dangerous ground.  Our self-worth will fluctuate like the wind, and with that leave us dry to the bone.

Maybe this doesn't apply directly to you because, like my husband, you're not really involved with social media, but I'm sure you can relate in some way, shape or form.  Ask yourself what you are putting your worth in.  If it's not True and Good and Lasting then, to put it simply, it's not worthy of you.

"Like" if you agree.

Bahahaha!  Sorry-- I just had to end that way!  ;)


Tuesday, November 5, 2013

Burlap in Wreath Form

I know I'm a little behind on the burlap wreath front, but I've been eying them on Pinterest for a while now and I finally had a "free" Saturday to attempt one myself (what is free really, when you have kids?).
Here is how it turned out:
Isn't it pretty?  I love how simple and elegant it is.

It was surprisingly easy, although nothing is truly easy for me.  I like to make things more difficult for myself.  For example, I got the wrong size burlap.  Eh, oh well.  I like the way it turned out, and I'm actually glad I made that mistake.  I'll explain why later.

So, what you need to make this gorgeous wreath:

1-2 rolls of 2 1/2-4 in. wide WIRED burlap ribbon (I used a little less than 2 30 ft. rolls of 2 in. wide WIRED burlap)
1 wire wreath frame (pick your size- I did 16 in.)
Any bows you want to add!

***If you don't use a wired burlap ribbon, you might want to check out this blog about using floral wire to secure it-- I didn't have to do that because I used the wired ribbon. :)  Also, I found mine at Hobby Lobby... I'm not sure which craft stores have this type of burlap ribbon.***

Step 1:
Insert the burlap into the top rung.  String in and out through the next two rungs, and bring it out the bottom.  (FYI:  Your burlap stays on the roll the whole time.  This confused me for quite some time, but you'll get the hang of it pretty quickly.)


 Step 2:  From the top rung, pull up a couple inches of fabric (or whatever looks good to you).  Twist it to secure it underneath.  Then pull up more fabric through the next rung.  Squish and mold as you go.

(This is what it looks like underneath.)

Step 3: Continue this pattern.  Pull up fabric, twist underneath, then pull up more fabric in the next rung.  After you get to the bottom rung, start back up at the top.


Eventually you'll start noticing these pretty burlap bubbles.  The benefit of the rolls of burlap I used was that they were wired.  I could mold and shape the burlap how I liked it.  Also, while all burlap wreaths are pretty, I prefer the tighter/cleaner burlap wreaths over the big/loose ones.  Using the 2-inch wide burlap helped achieve this look.

Here is what the back of my wreath looks like.  I ran out of burlap about 2/3rds of the way through (SO frustrating!).


The cool part about this wreath is that you do not have to hot glue anything-- not even the bows!  I simply used a safety pin to secure my bow onto my wreath.  I've seen others suggest using wires.  I plan to change my bows out every season (or when I remember).


Lastly, you may have noticed the picture with lights on my wreath.  That's an experiment, really, but I do kind of like it.  I bought battery-powered LED lights (THEY MUST BE LED-- ANY OTHER KIND COULD START A FIRE!  LED lights do not get hot!).  I didn't like how bright and clear they were, so I taped each light with a piece of masking tape to tone it down a little.  Then I simply stuck the lights in the burlap, securing it under the wire rim of the frame every so often.


Something fun and different, I suppose.  :)

Burlap wreaths are totally doable.  I got the hang of it after the first few minutes, and if I can do it, you can, too!